
Introduction
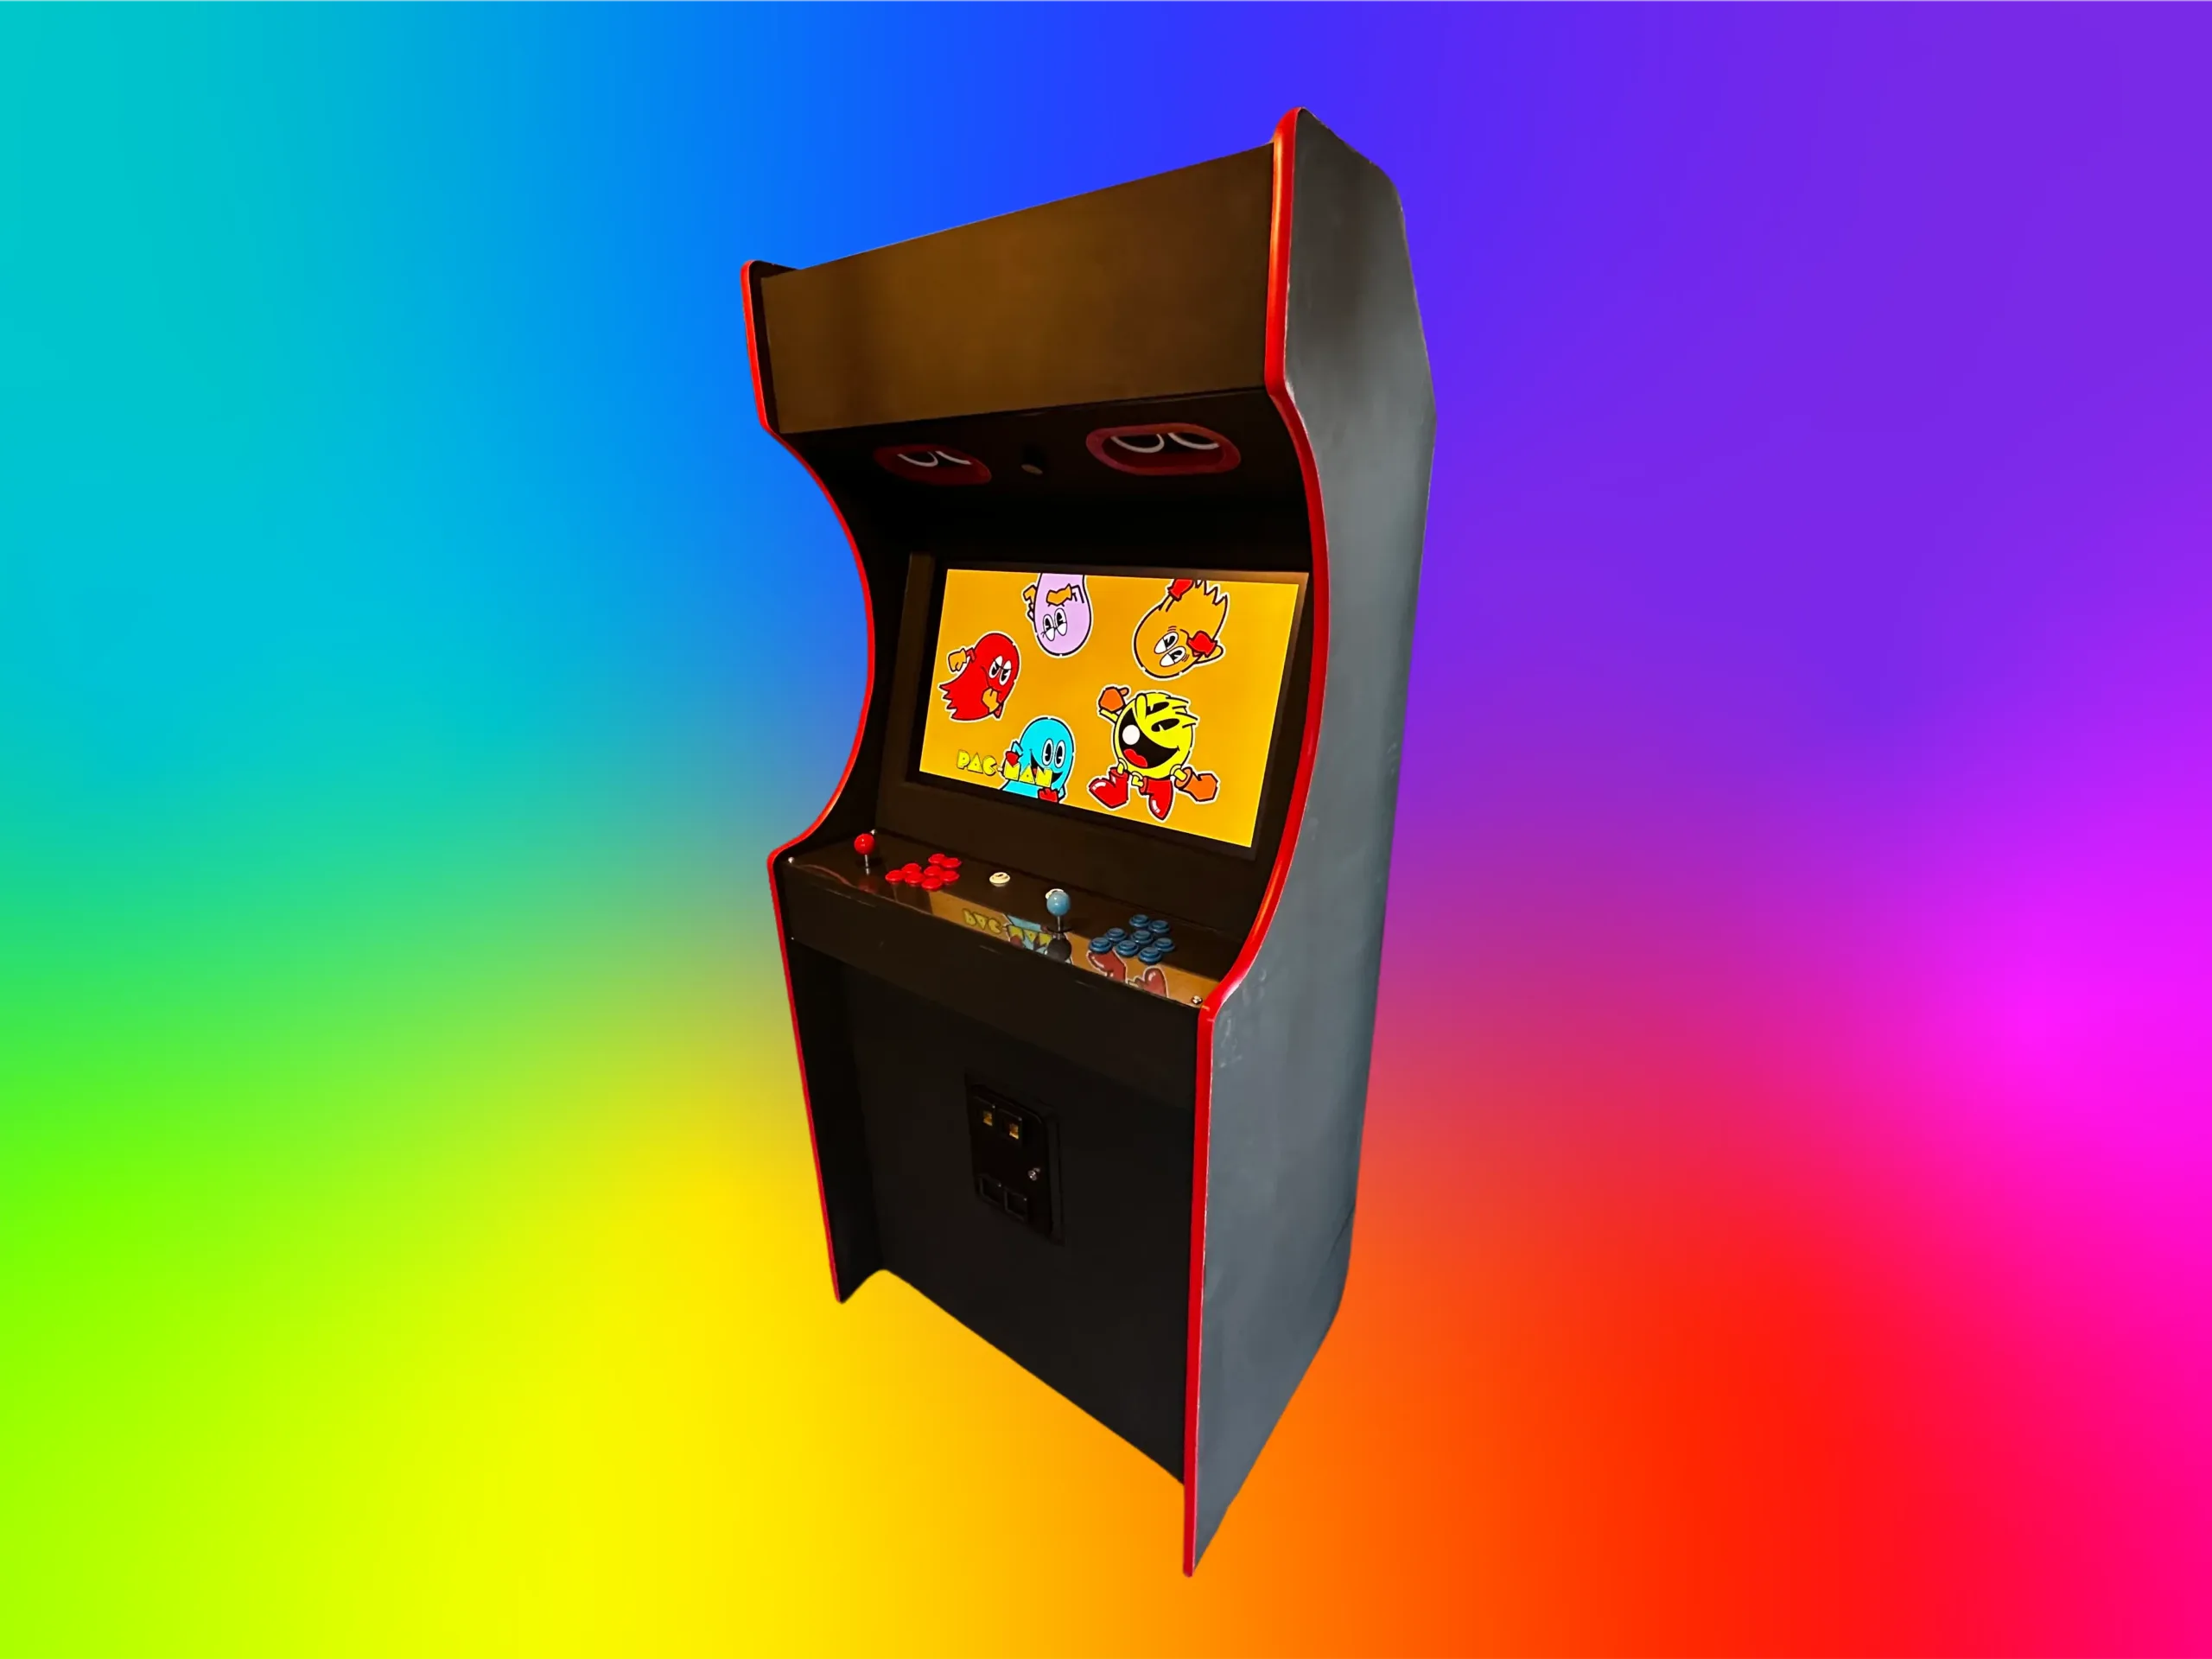
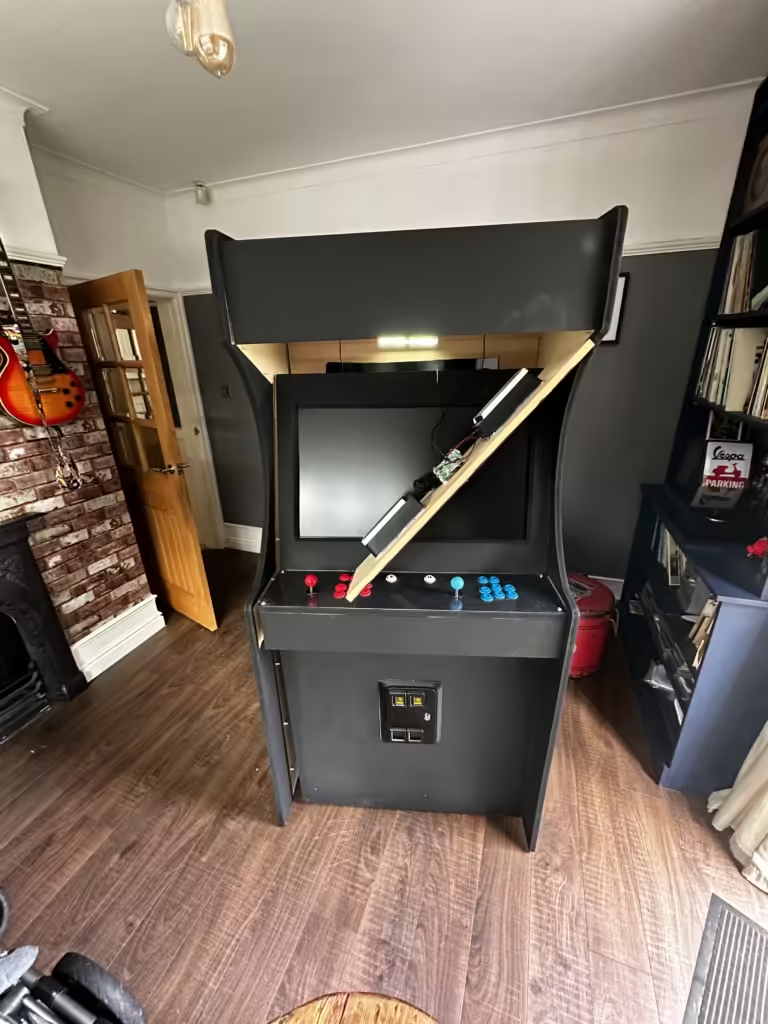
There’s something magical about the nostalgic glow of an arcade machine, the satisfying click of the joystick, and the simple joy of classic games. About a year ago, I decided to bring that magic into my home by building my very own arcade machine. It was a rewarding project that came with its own set of challenges and lessons, including a quite an unexpected turn.
The story
I started gathering parts for my arcade machine at the end of July 2023 and began designing it by mid-late August. A few weeks later, I jumped into assembling it. However, in early October, my excitement took a painful detour. While cutting a piece of MDF with a Dremel, the tool skipped and sliced my left index finger open, chipping the bone and completely severing a tendon. After a quick trip to A&E, six hours of waiting, and a surgery to repair the tendon and insert a metal rod, I faced four months of physiotherapy.
For months, the half-built arcade cabinet sat in my garage, a reminder of my unfinished project and the injury. But recently, at the start of July 2024, I got the urge to finally finish what I started. The sense of accomplishment I felt when I finally completed the arcade machine was well worth the journey.
In this guide, I’ll walk you through every step of the process—from gathering materials and designing your cabinet to assembling and configuring the electronics—so you can build your own arcade machine without (hopefully) any trips to A&E. Let’s dive in!
The Guide
Step 1: Planning and Design
Sketches
To begin with, create some simple sketches of what you want your cabinet to look like. This will help you visualise the final product and gauge the size you want, whether a small tabletop machine or a full-sized machine like mine.
3D Model
If you are comfortable and have the capability, it could be a good idea to take your sketches and create a 3D model of what you want the final product to look like. This can help in refining your design and planning the construction process.
Considerations for your design
When designing your cabinet, there are a few important factors to take into consideration. Here’s a list of things to think about:
- Computer: What is going to be the brains of the cabinet?
- Monitor: How big of a screen do you want?
- Power Supplies: How will the cabinet be powered?
- Speakers: How big are the speakers? How will you adjust the volume?
- Joysticks and buttons: How many buttons do you want? Do you want it to be a 1-player or 2-player setup?
- Access: How will you access the components if one were to fail?
- Cooling: How will you keep the computer cooled?
- Transport: How will you move the cabinet around?
This is how I answered these questions:
- Computer: I used a Raspberry Pi 3B+, as it is inexpensive and powerful enough to run RetroPie.
- Monitor: I chose an AOC Q32V4, this is a decent 32 inch monitor and I managed to get it on sale.
- Power Supplies: I used a fused C14 inlet in the back of the machine with an extension lead attached to it. For the Raspberry Pi, I used a 5V 3A plug.
- Speakers: I opted for a pair of Logitech Z200 PC speakers. They have built-in audio controls, and I found them for £10 on Facebook Marketplace.
- Joysticks and buttons: I wanted a 2-player cabinet, so I got a cheap set of buttons and joysticks, complete with encoders, from AliExpress. I also included a coin input for that authentic arcade vibe. I found a door for a 2-coin input on AliExpress and two 10p coin mechs from Arcade World UK (which no longer exists). I then bought 100 tokens from AliExpress for £15.35 (yes, it would have been cheaper to use 100 10p coins, but I wanted tokens).
- Access: I decided to use a 558x558mm access panel, which I got from Access Panels Direct for £31.07 including shipping.
- Cooling: For cooling, I decided on two 120mm USB fans mounted at the top, one as an intake and the other as an exhaust.
- Transport: I decided on 2 75mm heavy duty casters with brakes and 2 without breaks, as this would make moving it around really easy.
My Design
After considering all these factors, this is the design I arrived at:
Step 2: Gathering Materials and Tools
Before you start building your arcade machine, it’s crucial to gather all the necessary materials and tools. Having everything on hand will make the process smoother and more enjoyable.
Materials I used:
- 18mm MDF:
- 2x 595×1850 mm (sides)
- 1x 812×1618 mm (back)
- 1x 812×302 mm (top angle)
- 1x 812×233 mm (top)
- 1x 812×203 mm (marquee)
- 1x 812×260 mm (top shade)
- 1x 812×598 mm (screen)
- 1x 812×200 mm (control panel)
- 1x 812×124 mm (control panel front)
- 1x 812×523 mm (control panel bottom/internal shelf)
- 1x 812x428mm (bottom)
- Monitor: Choose a monitor that fits your design and provides a good display quality for your games. I used an AOC Q32V4, a 32-inch monitor.
- Raspberry Pi: The brain of your arcade machine. I used a Raspberry Pi 3B+ for its affordability and performance.
- RetroPie SD Card: You will need an SD card for the Raspberry Pi to boot from. I decided to use the RetroPie OS, but there are other options available. You can find installation instructions in the RetroPie Docs.
- Power Supply: Ensure you have a reliable power source for your Raspberry Pi and other components. A fused C14 inlet is recommended for providing the cabinet with power.
- Speakers: Good quality speakers enhance the gaming experience. I used Logitech Z200 PC speakers.
- Joystick and Buttons Kit: Essential for the arcade feel. Make sure to get a set that includes all necessary encoders and wiring.
- T-Molding (optional): For finishing the edges of your cabinet. It adds a professional look.
- Access Panel: Allows easy access to the inside of your cabinet for maintenance. I used a 558x558mm access panel.
- Coin Door (optional): For that arcade vibe, I opted for a 2-input coin door.
- 3D Printed Parts (optional): I created some mounts for the USB controllers and for the Raspberry Pi using my 3D printer. I also made some covers to give the edge of the speaker and fan holes a nicer finish.
- Cables: Make sure you have all the correct cables for your setup. Mine were as follows:
- 2x C13 cables (1 for the monitor and 1 to power the cabinet)
- Standard HDMI
Tools I used:
- Electric Screwdriver: For assembling the wood components.
- Electric Drill: For making holes and general assembly.
- 28mm Spade Bit: For drilling the button and joystick holes.
- Jigsaw: For cutting the wood to the required shapes and sizes.
- Paint Brushes/Rollers: For painting and finishing the cabinet.
- Dremel Tool: Useful for detailed cutting and finishing tasks. Handle with care to avoid accidents.
- Clamps: To hold pieces in place while working on them.
- Soldering Iron: For connecting wires securely.
- Measuring Tape: Ensures accurate measurements for cutting and assembling.
- 3D Printer (optional): For creating custom parts or enclosures.
By preparing all your materials and tools ahead of time, you’ll streamline the building process and avoid unnecessary delays. In the next step, we’ll dive into building the cabinet and assembling your arcade machine.
Step 3: Assembling the cabinet
With all your materials and tools ready, it’s time to start assembling the cabinet. Follow these steps to build a sturdy and functional arcade cabinet.
Cutting the Wood
Using your design sketch (or model) and measurements, mark the dimensions on the MDF sheets, double-checking your measurements to ensure accuracy. I had my wood pre-cut into rectangles, which saved a lot of initial cutting time. However, something I regret not doing beforehand was cutting the shape of the side panels. This oversight meant I had to cut one side panel while it was already attached to the cabinet, then use it as a template to trace and cut the second side panel.
Carefully cut the side panels to the correct shape using a jigsaw. If you have your panels pre-cut into rectangles, ensure to cut the shapes before assembly to avoid difficulties later. To cut the second side panel, trace the shape from the first panel to ensure both sides are identical. Sand the edges of each piece to remove any splinters and ensure a smooth finish.
In addition to the main pieces, you will need to cut holes for all necessary components. Mark and cut holes for the speakers on the front or sides of the cabinet, decide where you want the volume control knob and cut an appropriate hole, and cut holes for intake and exhaust fans to ensure good airflow. Use a 28mm spade bit to drill holes on the control panel for the buttons and joysticks. Cut out the area where the monitor will be mounted, making sure it fits snugly. Additionally, cut a hole for the access panel on the back of the cabinet for easy maintenance, and if you’re including a coin door, mark and cut a hole for it as well.
Assembly
Attaching Panels
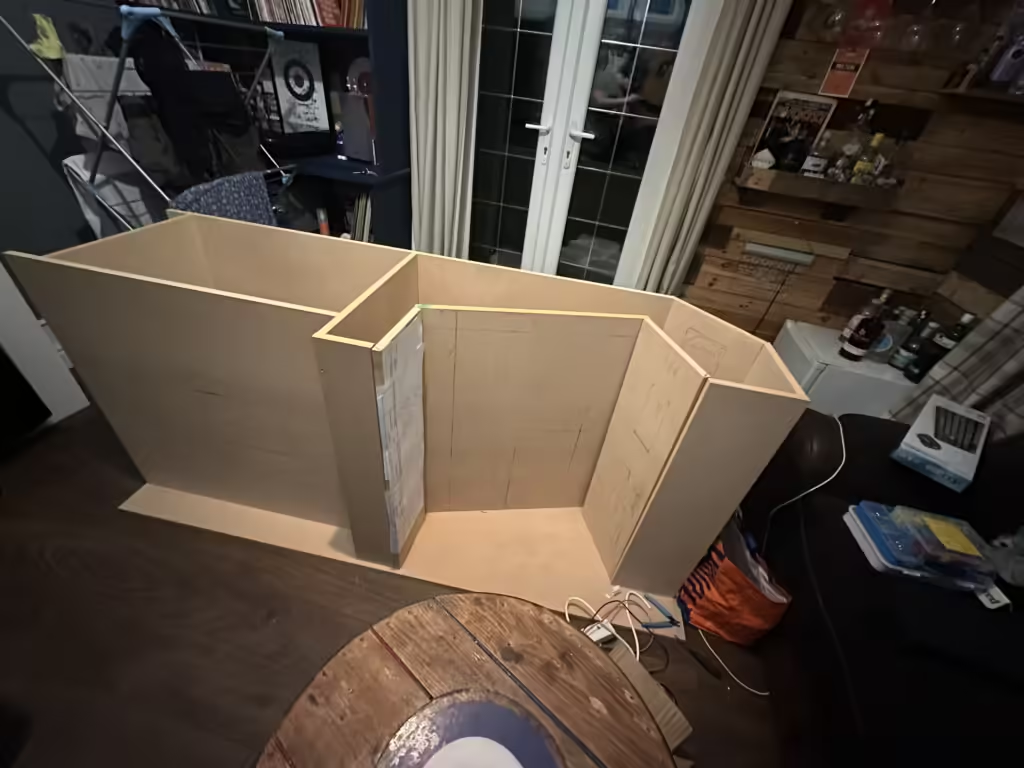
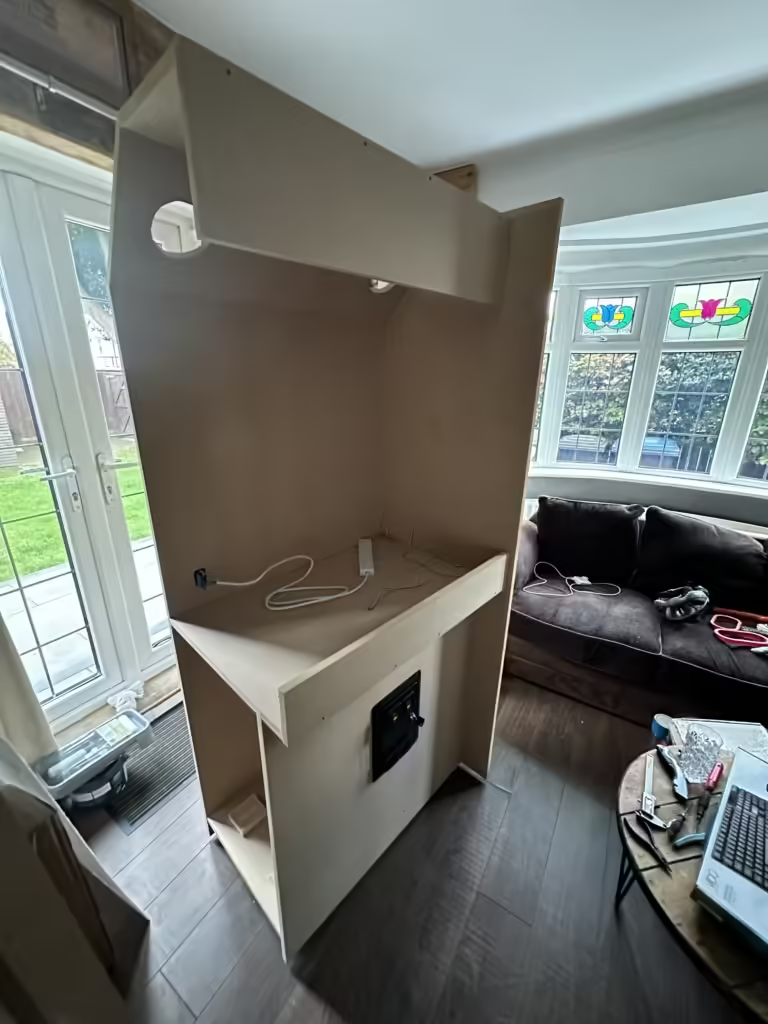
I started screwing all the panels (barring the screen, control panel, and speaker panel) to one of the side panels, which looked like this:
Cutting Holes
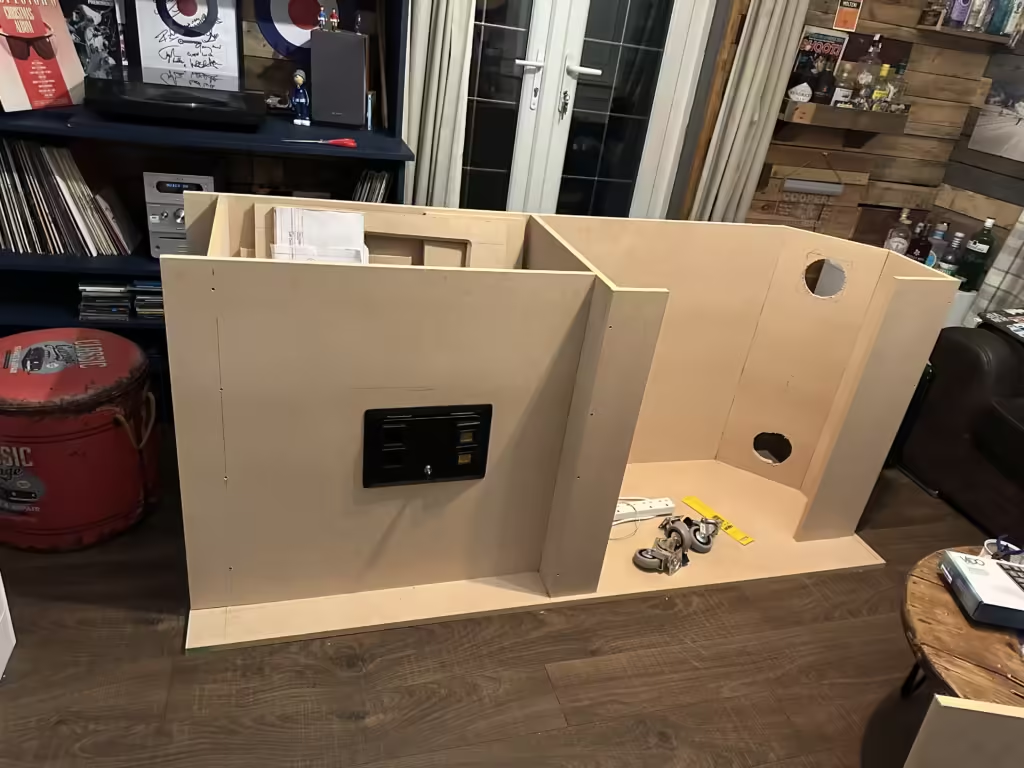
Next, I cut the holes for the coin door and the fans, as shown below:
Adding Power
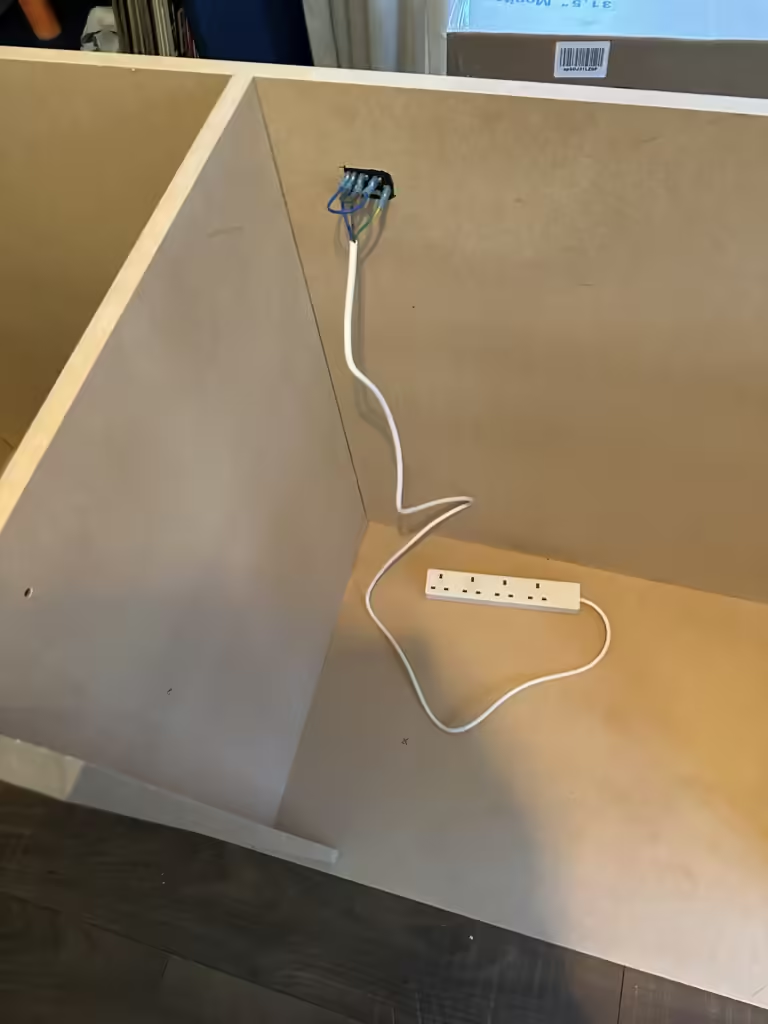
After that, I added the C14 inlet to the back panel and wired it up to an extension lead, pictured below. It should be noted that I am not an electrician and playing with mains power can be dangerous and is not advised.
Coin switches
I then added the switches for the coin door. I needed to drill a hole through the internal shelf to get these wires up to where the USB encoders will be living.
Easy Transport
Then I added wheels so that I could stand the cabinet upright and easily move it about. I used two 75mm heavy-duty caster wheels with brakes and two without.
Cooling Down
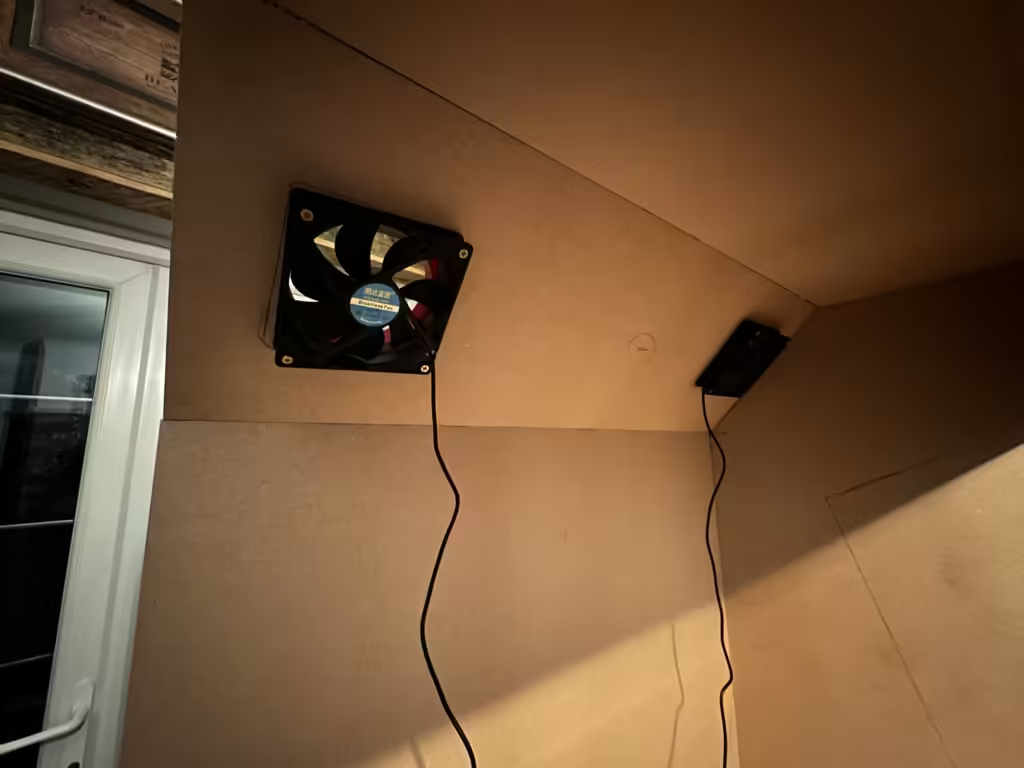
After that, I added the fans into the top angled panel, as pictured below:
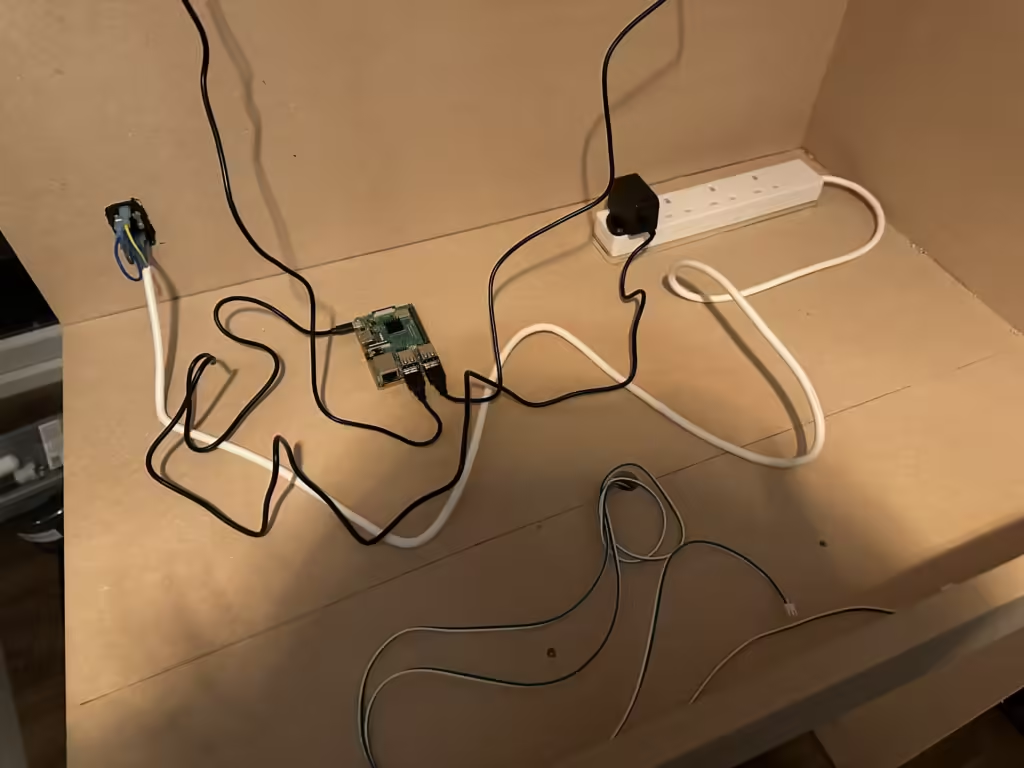
Adding the Pi
Next, I added the Raspberry pi and connected the fans to a USB hub.
Buttons
I then added the buttons and joysticks to the control panel and wired them all up to the encoders.

Test Time
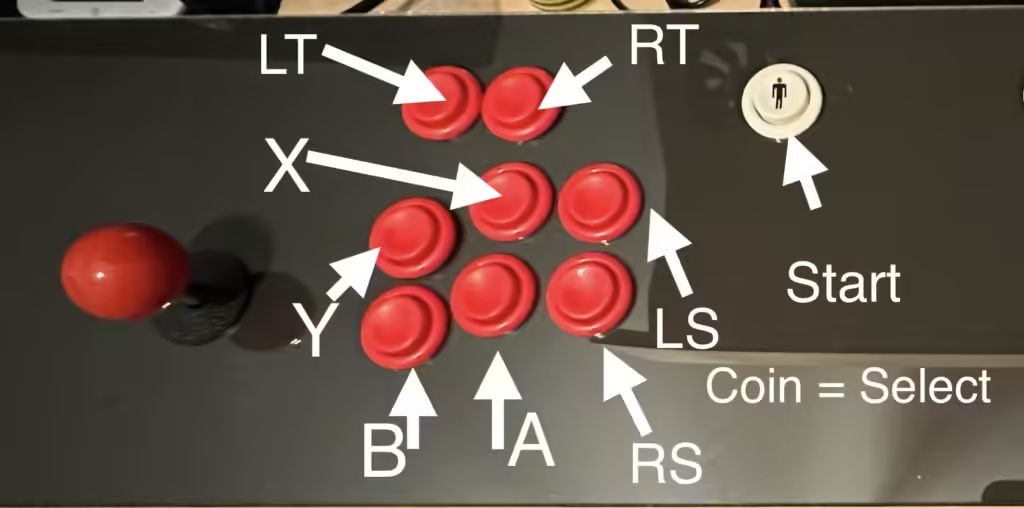
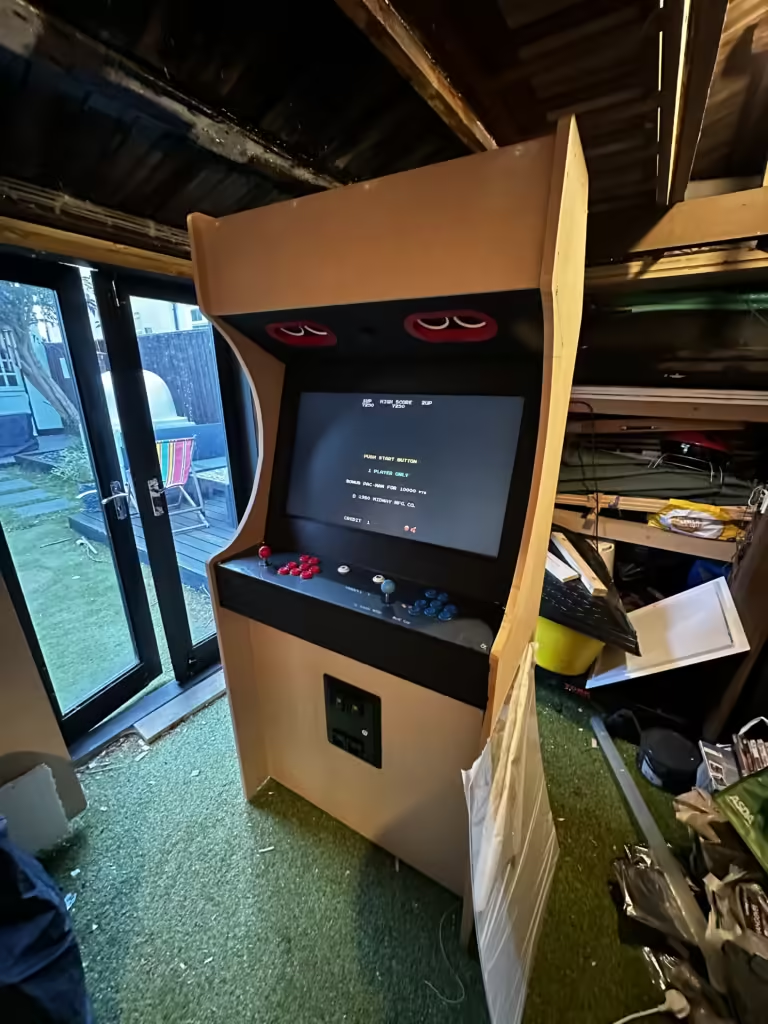
Before we go any further, it is time for a test to ensure that all the buttons and joysticks are wired up correctly. To do this, you will need to grab the control panel and monitor and connect them to the Pi. When we switch it on for the first time, we will be asked to map the controllers. Below is how I mapped mine:
Once we have done that, we can go ahead and maybe play one or two games just to keep us going:
Access Pt. 1
I then cut a hole in the back panel for the access panel:
Its Coming Together
Next, I added the other side panel to the cabinet, and you can see that it is now coming together.
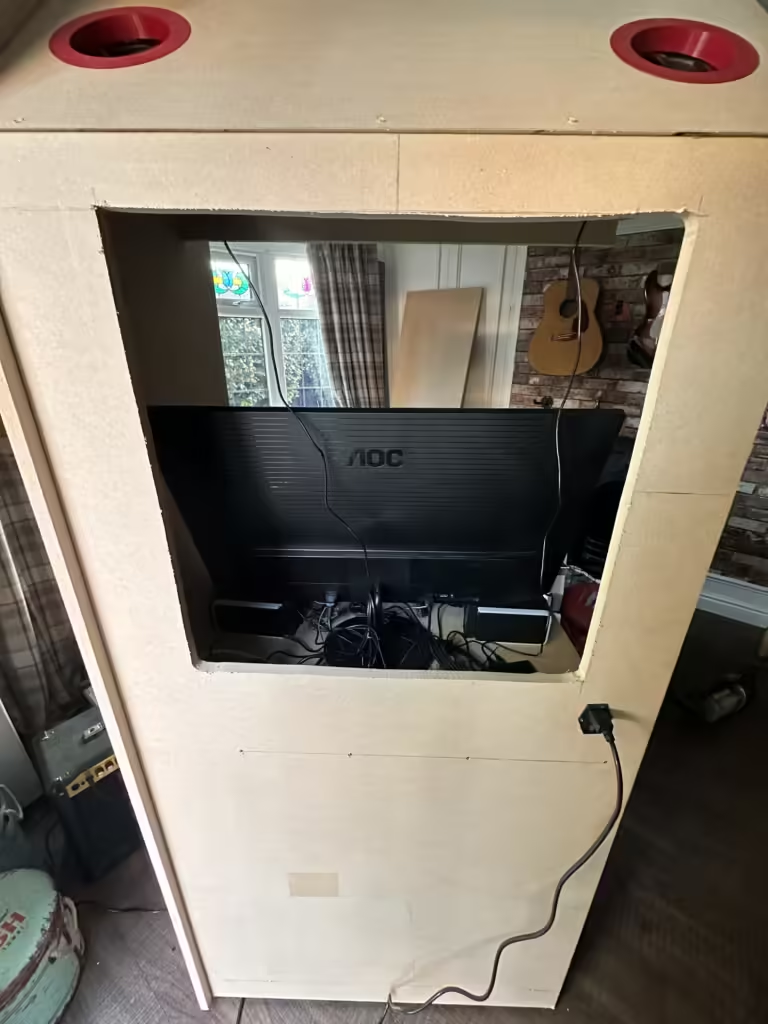
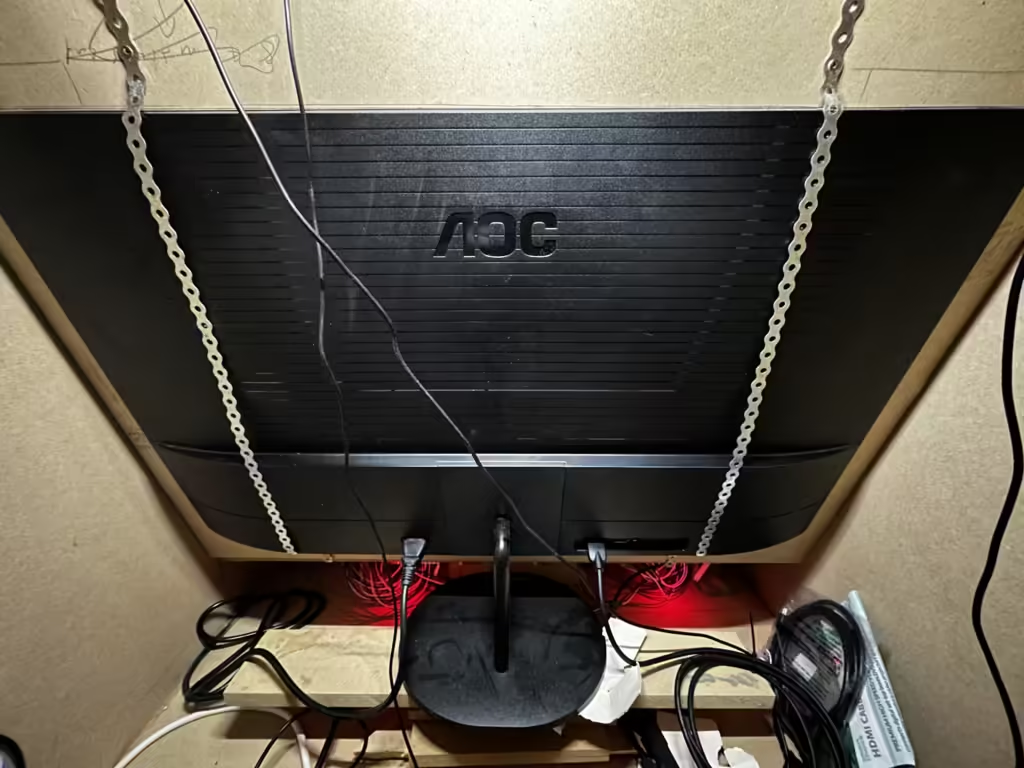
Monitor Positioning
I then had to pack the monitor up with some scrap wood to get it at the correct height and used some all-round band to secure the monitor to the frame.
A Splash of Colour
After that, I needed to fill all the screw holes with some all-purpose filler and add two coats of paint.
Disaster
While transporting the cabinet back from the garage into the house, disaster struck. The side panel came off as I was carrying it. But no worry, as I swiftly re-attached it with some more screws. I had to also fill the screw holes again and give it another two coats of paint.
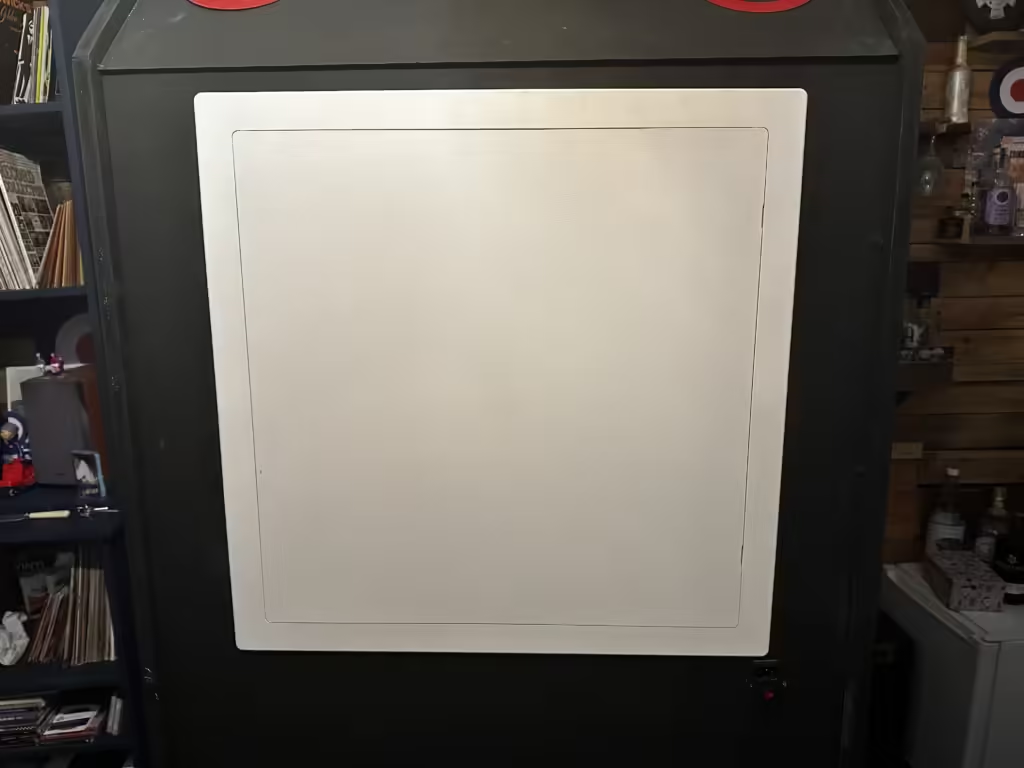
Access Pt. 2
After that, I finally added the access panel to the back of the machine.
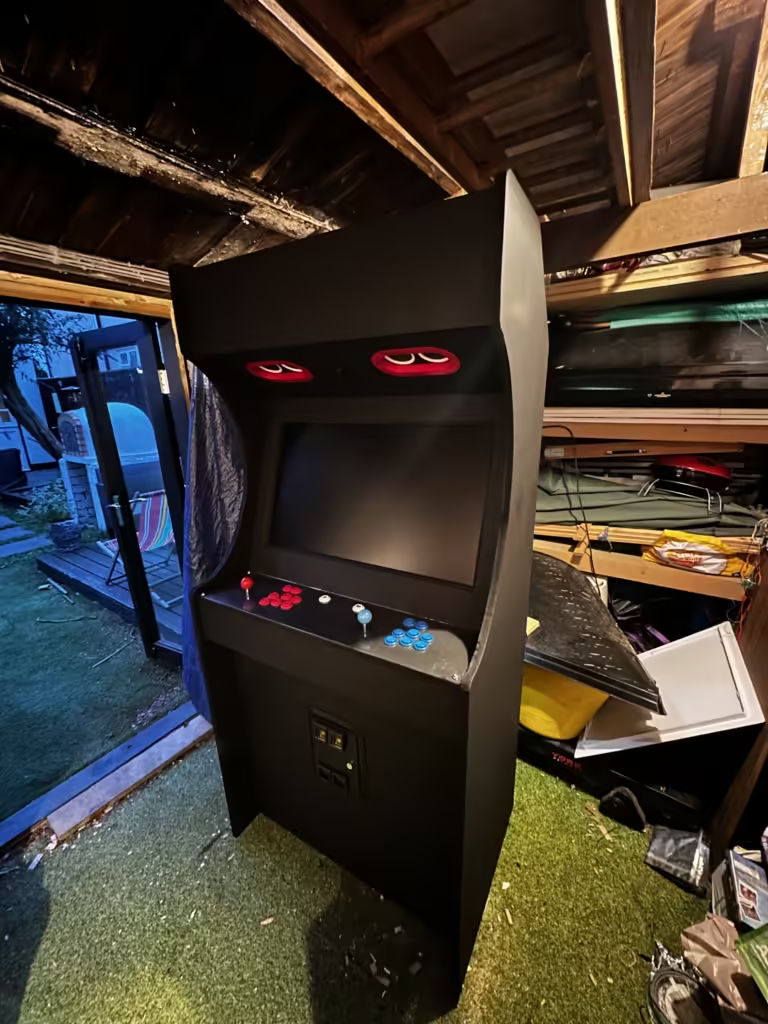
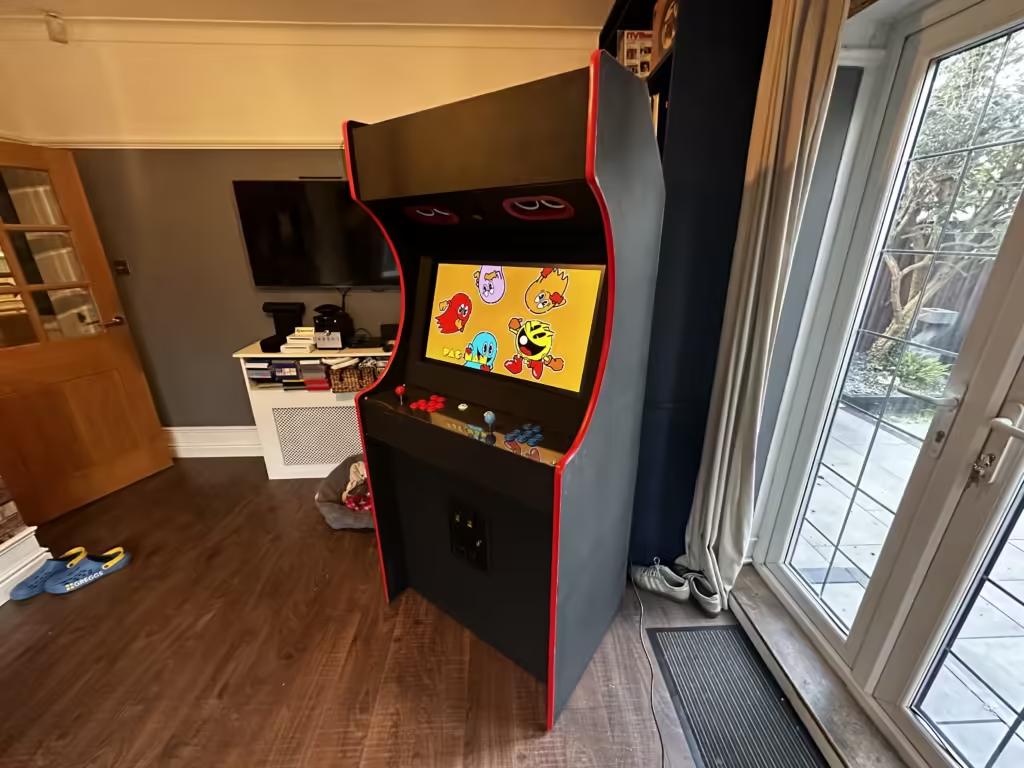
T-Molding
I finally added the T-molding to the cabinet to finish it off. I did not have the proper router bit, so I had to cut of the T bit of the T-molding and use some contact adhesive to stick it to the MDF. I then filled the gaps with some black silicone.
Cost Breakdown
| Material (with links where possible) | Cost (£ GBP) |
|---|---|
| MDF | £100 |
| Raspberry Pi 3B+ | £28.70 |
| Buttons/Joysticks/USB Encoder | £27.38 |
| Coin Door | £15.15 (Originally £30.31 w/ shipping, but arrived damaged) |
| Coin Mechanism (x2) | £56.62 |
| Coin Door Lock | £7.31 |
| AOC Q32V4 Monitor | £167.37 |
| Logitech Z200 Speakers | £10 |
| HDMI Cable | £6.38 |
| Fused C14 Inlet (x4) | £6.99 |
| C13 Cable | £7.01 |
| 120mm USB Fan (x2) | £9.99 |
| Access Panel | £31.07 |
| T-molding | £36.66 |
| 75mm heavy duty caster (x2) | £10.30 |
| 75mm heavy duty caster w/ brake (x2) | £13.38 |
| 28mm spade bit | £5.89 |
| All round band | £4.57 |
| Total | £544.77 |
Conclusion
Building your own arcade machine is a rewarding project that combines creativity, technical skills, and a love for classic games. From the initial design and careful selection of materials to the setup of the Raspberry Pi and the assembly of the cabinet, each step brings you closer to reliving the magic of arcade gaming in your own home.
Throughout this guide, I’ve shared not only the detailed steps and technical instructions but also my personal experiences and lessons learned. From the excitement of gathering parts to the challenges of assembly (and even a few mishaps along the way), this journey has been as enjoyable as it has been educational.
As you complete your arcade machine, you’ll not only have a functional piece of gaming history but also a unique creation that reflects your dedication and passion. Remember, every project has its ups and downs, but the key is to persevere and enjoy the process.
Now it’s time to power up your machine, grab those joysticks, and dive into the world of classic arcade games. Whether you’re playing solo or with friends, the arcade machine you built with your own hands will provide countless hours of entertainment and nostalgia.
I hope this guide has been helpful and inspiring. If you have any questions or want to share your own arcade machine project, feel free to leave a comment or reach out. Happy gaming!

Leave a Reply